Spotlight
Demoing the Blues Wifi + Cell Communication Module
Explore the Blues Cell + Wifi communication module on a Raspberry Pi Zero, Notehub, and thoughts on the pros and cons of utilizing Blues in your IoT project.


Filtering data is an essential part of any exceptional QuickSight dashboard, especially as you increase the volume of your data and the complexity of the stories you want to show. In all great data stories the interaction of the audience plays a huge role in how compelling these stories are, and allowing your users to apply filter conditions themselves through filter controls is your most valuable resource for this. However, with great power comes great responsibility, and adding tons of filter controls for different variables can hinder the ability of your audience to follow the main plot of the story -much like a lot of us get lost in the vastness of today’s Marvel universe-.
URL parameters are a very handy tool when it comes to handling multiple filter controls in your QuickSight dashboards. Parameters are named variables that can transfer a value for use by an action or an object. By using parameters, you can create an easier way for a dashboard user to interact with dashboard features in a less technical way. Parameters in QuickSight can accomplish different tasks including filtering, automating calculated fields, creating actions, or adding external links to visuals. URL parameters allow users to add a query-like string at the end of the URL for a dashboard which automatically applies conditions to the filter controls mapped to your visuals. This happens upon loading the dashboard and without manually interacting with filter controls. Once implemented, users are able to use direct links that they can then bookmark with their specific set of parameters pre-defined. From substantial practical efficiency to providing less savvy users with a pre-filtered view, there is immeasurable value in implementing URL parameters.
In QuickSight, adding the string #p.parameter to a given dashboard URL to set that filter to the value 1234 results in the following:
https://us-east-2.quicksight.aws.amazon.com/sn/dashboards/abc123-abc1-abc2-abc3-abcdefef1234#p.parameter=1234
AWS documentation on implementing URL parameters is unclear when it comes to explaining this tool. Although there are user guides on using parameters in URLs and parameter filtering, one has to combine knowledge in both of these features to actually apply URL parameters to filter visuals. This heuristic should provide everything needed to seamlessly add this feature to any dashboards.
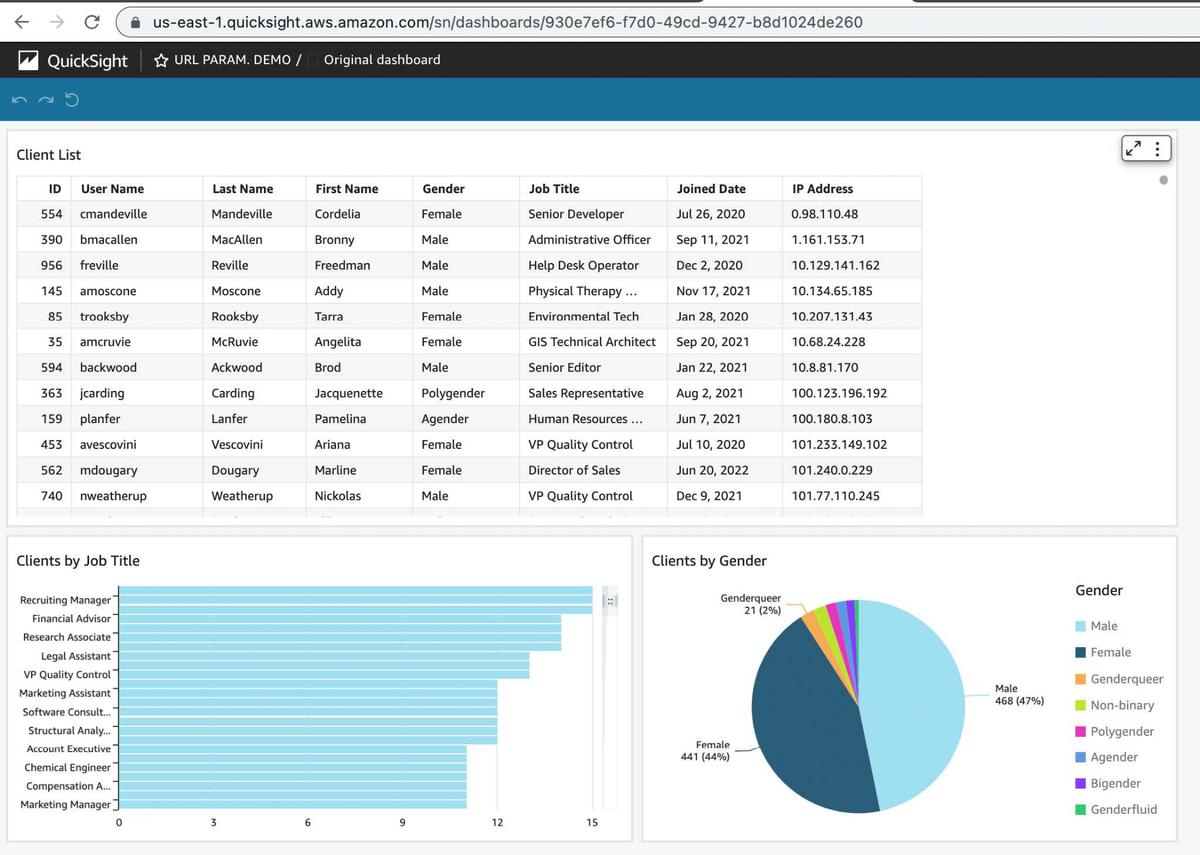
Goal: To be clear and concise in the process to create URL parameters, we will be using a randomly generated dataset of clients for a fictional company. We will use a sample dashboard that includes three visuals: a client list table, clients by job title bar graph, and a pie chart showing clients by gender. The goal will be to add filter controls that can be edited using URL parameters. Specifically, URL parameters that filter User Name = Miguel Campos Ribau and Joined Date between 2022/01/01 and 2023/01/01 for the dashboard below with a URL that reads as:
https://us-east-1.quicksight.aws.amazon.com/sn/dashboards/930e7ef6-f7d0-49cd-9427-b8d1024de260#p.startdate=2022-01-01&p.enddate=2023-01-01&p.username=Miguel Campos Ribau
For our purposes we want to use parameters to filter our visuals.
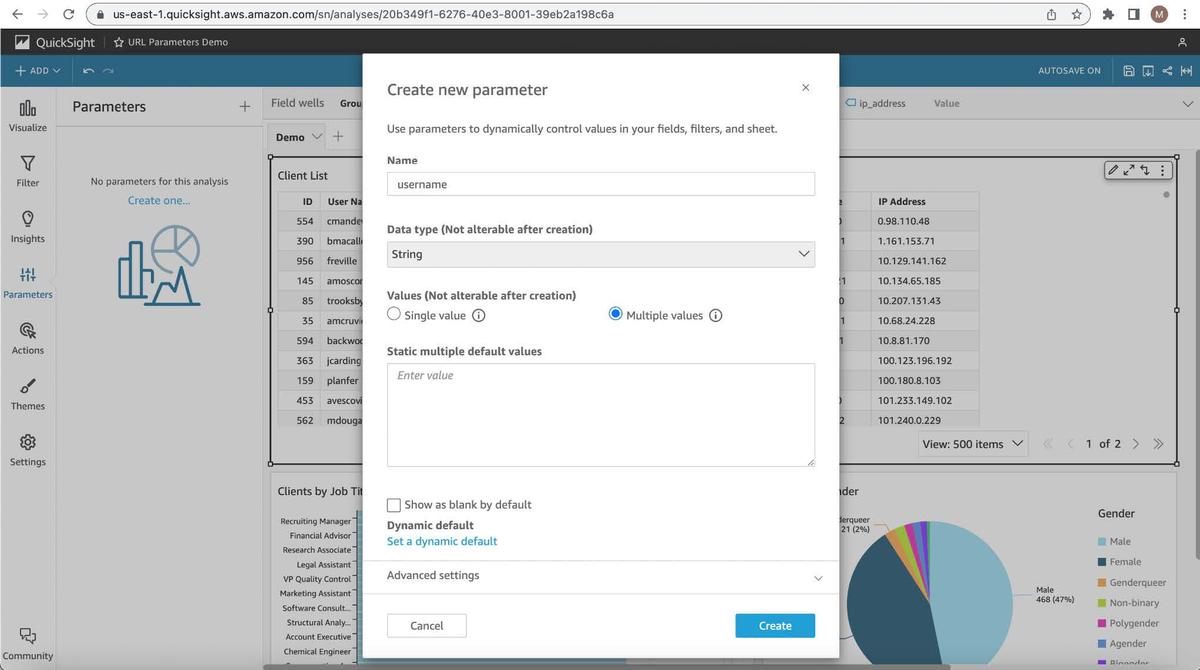
For parameters using dates, you need to create two parameters, one for the start date and another for the end date.
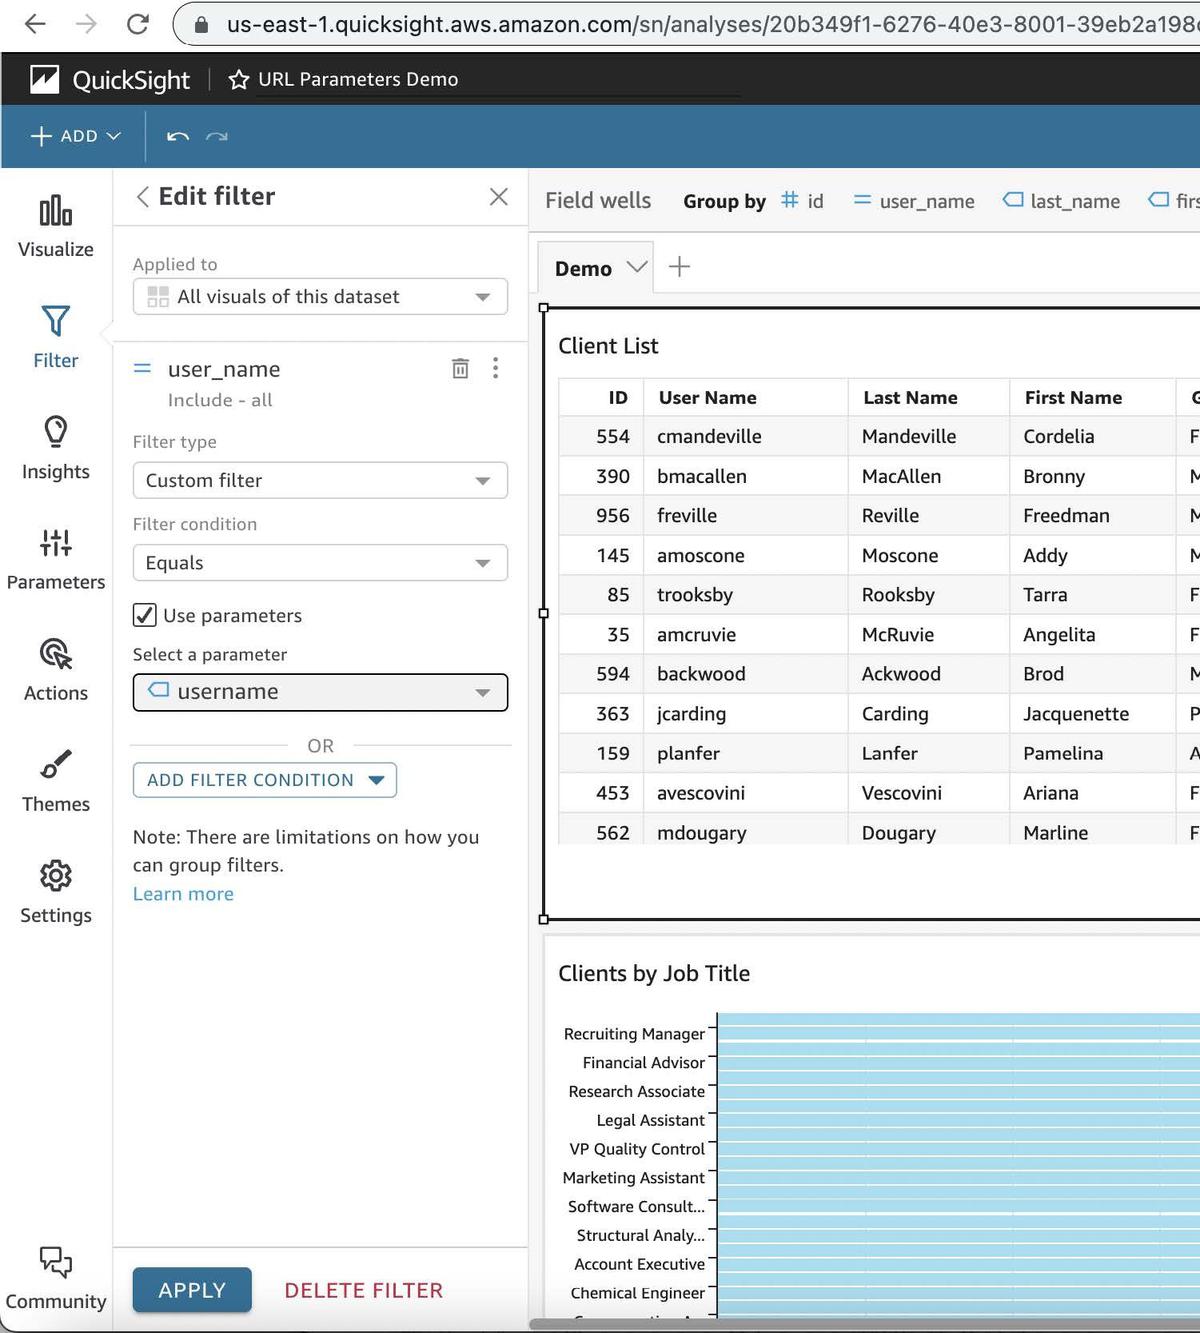
The parameter is now active and attached to the corresponding filter, it can be used in a URL!
For parameters using dates, selecting Date & time range and selecting Condition equal to between will allow you to select the start and end date parameters you previously created.
In most cases, you will still want to add the filter to the top of the visual to avoid confusion on what your current selection is and to allow your user to manually be able to select desired values.

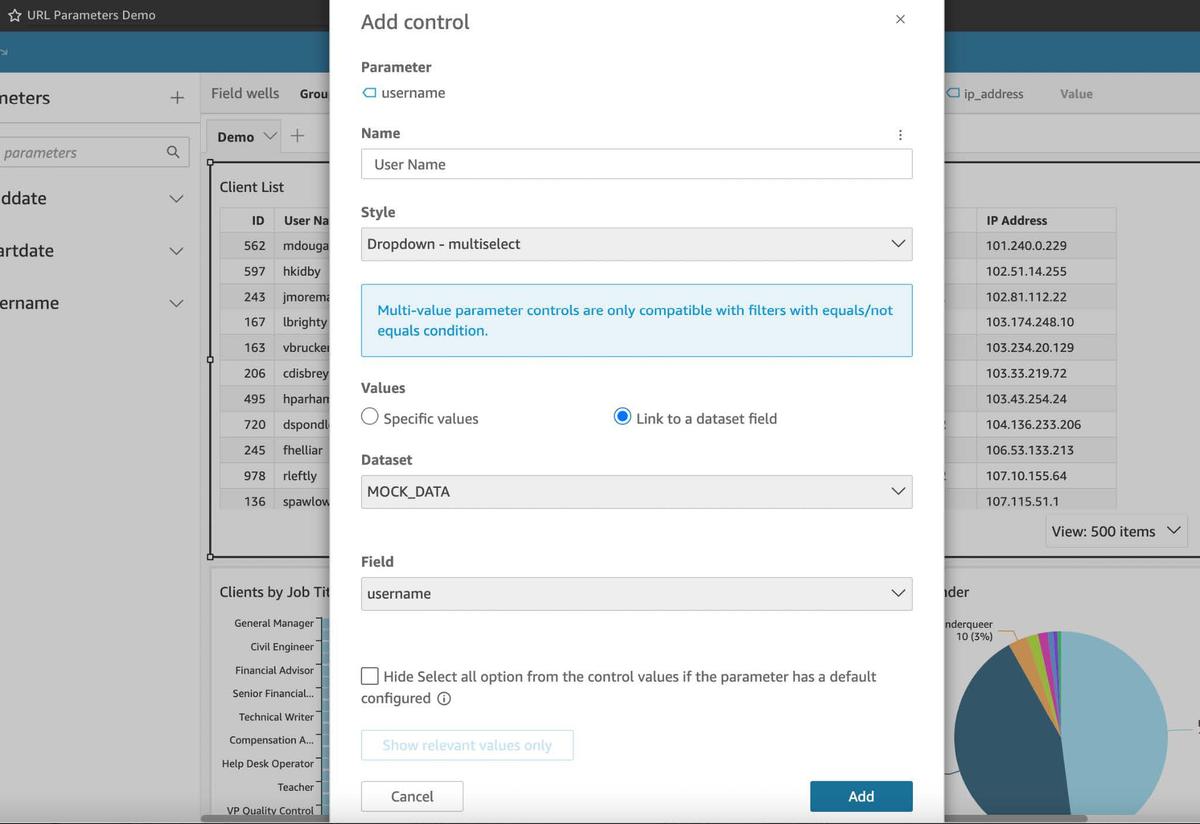
The parameter can now be used in the URL and will match the one present in the Controls section of the report so that it can also be used as any other manual filter!

Make sure that once you have entered the URL with the parameters you refresh the page; a simple enter will just modify the URL but changes won’t go through until you do that.
Parameters are added to the end of the URL by adding #, followed by p.parameter. to additional parameters & should come after the end of your last parameter definition.
Example: To filter the Joined Date between 2022/01/01 and 2023/01/01, URL should read as:
https://us-east-1.quicksight.aws.amazon.com/sn/dashboards/930e7ef6-f7d0-49cd-9427-b8d1024de260#p.startdate=2022-01-01&p.enddate=2023-01-01&p.username=mcamposribau

With this final step, we can consider the goal set in the introduction as accomplished!
Parameter definitions WILL work with spaces. If the value you want to pass is a string with spaces, you can set the parameter equal to that string exactly as is without removing the spaces.
Example: To set Last Name equal to Campos Ribau, the URL should read:
https://us-east-1.quicksight.aws.amazon.com/sn/dashboards/930e7ef6-f7d0-49cd-9427-b8d1024de260#p.lastname=Campos Ribau
QuickSight will automatically reformat the URL upon refresh to:
https://us-east-1.quicksight.aws.amazon.com/sn/analyses/20b349f1-6276-40e3-8001-39eb2a198c6a#p.lastname=Campos%20Ribau
To pass multiple values for a single parameter you have to repeat the parameter definition every time you want to include an additional value.
Example: To set username equal to mcamposribau and jmoreman, the URL should read:
https://us-east-1.quicksight.aws.amazon.com/sn/dashboards/930e7ef6-f7d0-49cd-9427-b8d1024de260#p.username=mcamposribau&p.username=jmoreman
To return all values, set the parameter equal to All (p.username=All).
Congratulations on now being able to leverage the power of URL parameters! At this point, you should be able to start applying this strategy in all of your QuickSight dashboards. If you are interested in advanced solutions and implementations in Amazon QuickSight, please reach out.

Explore the Blues Cell + Wifi communication module on a Raspberry Pi Zero, Notehub, and thoughts on the pros and cons of utilizing Blues in your IoT project.