Spotlight
How to Use IPv6 With AWS Services That Don't Support It
Build an IPv6-to-IPv4 proxy using CloudFront to enable connectivity with IPv4-only AWS services.


Managing the complexity of Kubernetes clusters can be a daunting task, especially when it comes to deploying and synchronizing applications across multiple environments. Wanting to research how to better navigate such challenges, I decided to research the popular GitOps Continuous Delivery tool known as Argo CD. Argo CD is an open-source GitOps continuous delivery tool that brings simplicity and automation to Kubernetes cluster management. With this tool, platform engineers can leverage the power of GitOps to declaratively define the desired state of their Kubernetes clusters in Git repositories, allowing for efficient and automated application deployments.
This post is the first in another Kubernetes-related series where I’ll be researching DevOps practices through the lens of this particular tool. Subsequent posts will entertain some of the other Argo project tools available on the following website:
Let’s kick this post off by reviewing how Argo CD is explained in the project’s own documentation.
Argo CD is implemented as a Kubernetes controller which continuously monitors running applications and compares the current, live state against the desired target state. Argo CD reports & visualizes the differences while providing facilities to automatically or manually sync the live state back to the desired target state. Any modifications made to the desired target state in the Git repo can be automatically applied and reflected in the specified target environments.
Put another way, Argo CD is a declarative GitOps continuous delivery tool for Kubernetes. Let’s dive a little deeper into what this actually means.
GitOps is a software development and delivery process that emphasizes using a Git repository as the source of truth for defining the desired state of a system (such as cloud infrastructure or a software application). In this continuous delivery process, the entire delivery pipeline, from code commit to deployment, is automated and version-controlled using Git. The desired state of the system, including infrastructure, configuration, and/or application source, is defined as code and captured as commits in a repository. Once committed, the declared system state can be continuously synchronized with the live system using a GitOps deployment tool. The result is a reliable continuous delivery process that enables DevOps teams to quickly and confidently deploy code changes in an automated and auditable fashion.
Argo CD is a GitOps-based continuous delivery tool that employs a “pull” model when synchronizing system states. A “pull” model is where the target environment "pulls" the latest commit from a source control repository and updates itself automatically in accordance with the declared system state. This is in contrast to a "push" model, where changes are pushed from the development environment into the target environment.
The “pull” model of continuous delivery looks something like the following:

The significance here is that a “push” model requires the delivery mechanism be provided inbound network access into the target environment whereas a “pull” model only requires outbound network access. Outbound connections are considered less risky as internal networks are typically secured via least privilege access controls with trusted entities initiating network communications. Inbound connections pose a greater security risk as they originate from external, untrusted networks and can potentially contain malicious traffic.
At a high level, the Argo CD deployment process works in the following manner:
Please note that this workflow summation leaves out an important step where Continuous Integration is typically performed. Continuous Integration processes are used to automate the building and testing of application code to ensure that requirements and standards are being met prior to production deployment. Outside of this brief definition, I’ll leave a deeper discussion of this topic for another point in time.
Let's move on and quickly go over the three main components that comprise Argo CD's architecture.
The API server is a gRPC/REST server that exposes the API consumed by the Web UI, CLI, and CI/CD systems.
The repository server is an internal service that maintains a local cache of the Git repository holding the application manifests. It is responsible for generating and returning the Kubernetes manifests.
The application controller is a Kubernetes controller which continuously monitors running applications and compares the current, live state against the desired target state (as specified in the repository). It detects application states that have deviated from the declared configuration and optionally take corrective action. It is responsible for invoking any user-defined hooks for lifecycle events (PreSync, Sync, PostSync).

Argo CD supports the following declarative formats:
We’ll be using standard Kubernetes manifests in this post. You will see Argo CD documentation refers to these sources as “directories”.
Now that we’ve got a decent idea of what Argo CD is, the value it offers, and how it’s built, let’s begin working through its installation so we can gain a better understanding of how it’s used to manage Kubernetes workloads.
The prerequisites for this walkthrough are as follows:
We’ll start by installing the “argocd” command line tool. Execute the following CLI commands to accomplish this
curl -L
'https://github.com/argoproj/argo-cd/releases/download/v2.5.8/argocd-linux-amd64' > /usr/local/sbin/argocd
chmod 0755 /usr/local/sbin/argocd
We’ll now need to create a namespace for Argo CD to operate within. Execute the following CLI command to accomplish this.
kubectl create namespace argocd
Next, we’ll download the installation manifest and apply it to our Kubernetes cluster.
curl -L
https://raw.githubusercontent.com/argoproj/argo-cd/v2.6.0/manifests/ha/install.yaml > argocd-ha-install.yaml
kubectl apply -n argocd -f argocd-ha-install.yaml
Note that this is the High-Availability installation type. You can work with the non-HA version If you’re short on system resources. Just use the following set of CLI commands, instead.
curl -L
https://raw.githubusercontent.com/argoproj/argo-cd/v2.6.0/manifests/install.yaml > argocd-install.yaml
kubectl apply -n argocd -f argocd-install.yaml
You’ll want to acquire the admin password after the installation process completes. Execute the following CLI commands to accomplish this.
kubectl get secrets argocd-initial-admin-secret -n argocd -o json | jq -rM '.data.password' | base64 -d
This is a highly sensitive piece of information. Store this information somewhere secure. Especially when working in production systems.
With this information, we can now connect to the UI using a web browser. But first, let’s port forward the internal Argo CD service to an external address. Execute the following CLI commands to accomplish this.
kubectl port-forward svc/argocd-server -n argocd 8443:443 --address='0.0.0.0'
An important caveat to note here is that I’m working on a bare-metal Kubernetes cluster running in my home laboratory network and am not worried about threat actors accessing this open port. I would highly advise taking the necessary precautions if your cluster is exposed to the internet. This configuration is beyond the scope of this blog post and, as such, will place the onus of securing access to your cluster up to you.
The IP address of the server I ran this command from happened to be 192.168.0.161. This has me visiting the following URL to access the Argo CD web interface:
https://192.168.0.161:8443
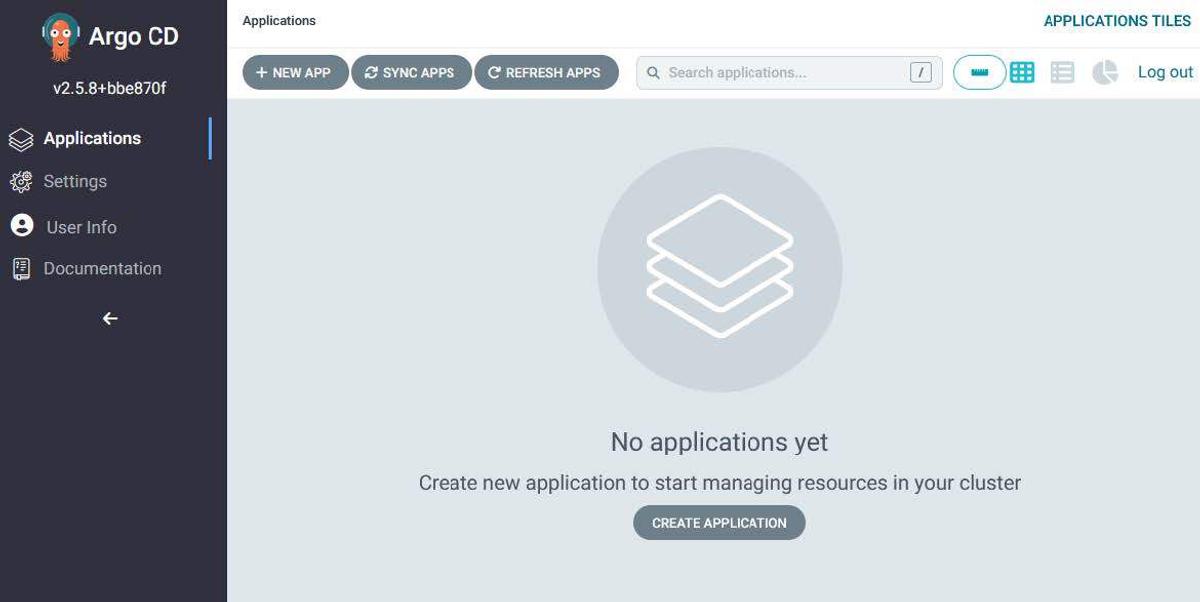
After logging in using “admin” as the user and the password we previously retrieved, you should see something like the following:
Let’s now log in using the Argo CD command line tool. Execute the following command to accomplish this:
argocd login 192.168.0.161:8443
Again, 192.168.0.161 is an IP address within my network. This will not be the same as yours.
You can change the admin password using the following CLI command. Probably not a bad idea to do so if working in a production environment.
argocd account update-password
At this point, we will mainly stick to using the CLI when interacting with Argo CD and our Kubernetes cluster.
Let’s keep going and create our first Argo CD application. We’ll accomplish this by executing the following CLI command.
argocd app create foo-app --repo
https://github.com/trek10inc/exploring-gitops-with-argo --path part1/app1 --dest-server https://kubernetes.default.svc --dest-namespace default
Note that this command creates an application using a public repository. Creating applications using private repositories is out-of-scope for this blog post. You can read more about how to accomplish this at the following link:
https://argo-cd.readthedocs.io/en/stable/user-guide/private-repositories/
Moreover, also note the “path” attribute supplied in the CLI command. This is what tells Argo CD where to look for Kubernetes manifests. This attribute allows you to store multiple applications in a single repository.
Once the command execution finishes, we’ll list our newly created Argo CD application using the following CLI command:
argocd app get foo-app
You should see something like the following:
Name:               argocd/foo-app
Project:            default
Server:             https://kubernetes.default.svc
Namespace:          default
URL:                https://192.168.0.161:8443/applications/foo-app
Repo:               https://github.com/trek10inc/exploring-gitops-with-argo
Target:
Path:               part1/app1
SyncWindow:         Sync Allowed
Sync Policy:        <none>
Sync Status:        OutOfSync from  (37b85c8)
Health Status:      Missing

GROUP  KIND        NAMESPACE  NAME     STATUS     HEALTH   HOOK  MESSAGE
       Service     default    foo-svc  OutOfSync  Missing
apps   Deployment  default    foo-app  OutOfSync  Missing
Make note of the “OutOfSync” status for both the “Service” and “Deployment” resources. The application status is initially in an “OutOfSync” state since the application has yet to be deployed meaning no Kubernetes resources have been created.
To sync (deploy) the application, execute the following CLI command:
argocd app sync foo-app
With this command, Argo CD will retrieve the latest commit from the monitored repository and perform a “kubectl apply” using the manifests it contains.
The “foo-app” application should now be running. You can view its resource components, logs, history, and assessed health status.
argocd app get foo-app

Name:               argocd/foo-app
Project:            default
Server:             https://kubernetes.default.svc
Namespace:          default
URL:                https://192.168.0.161:8443/applications/foo-app
Repo:               https://github.com/trek10inc/exploring-gitops-with-argo
Target:
Path:               part1/app1
SyncWindow:         Sync Allowed
Sync Policy:        <none>
Sync Status:        Synced to  (37b85c8)
Health Status:      Healthy

GROUP  KIND        NAMESPACE  NAME     STATUS  HEALTH   HOOK  MESSAGE
       Service     default    foo-svc  Synced  Healthy        service/foo-svc created
apps   Deployment  default    foo-app  Synced  Healthy        deployment.apps/foo-app created


—------

argocd app logs foo-app

waiting 0
Starting application server
Web server is running on port 80
waiting 0
Starting application server
Web server is running on port 80
waiting 0
Starting application server
Web server is running on port 80

—--

argocd app history foo-app

ID  DATE                           REVISION
0   2023-02-08 15:15:33 -0700 MST   (37b85c8)
Note that Argo CD did not automatically deploy the latest committed version of our application. We had to manually synchronize the local system state with the remote declaration stored in our repository. As the entire point of leveraging Argo CD is to automate the deployment process, we’ll want to enable what Argo CD calls an “Automated Synch Policy”.
Argo CD has the ability to automatically sync an application when it detects differences between the desired manifests in Git and the live state in the cluster.
Use the following CLI command to enable the automatic synchronization of our application:
argocd app set foo-app --sync-policy automated
You can learn more about the added features a synchronization policy can leverage at the following URLs.
https://argo-cd.readthedocs.io/en/stable/user-guide/auto_sync/
https://argo-cd.readthedocs.io/en/stable/user-guide/sync-options/
Let’s now access the web server running on the NodePort service we created by deploying the “foo-app” application. We’ll first need to find the IP addresses of our cluster nodes and the ports the “foo-svc” service is listening on.
You can obtain the IP addresses of your cluster’s nodes via the following CLI command:
kubectl get nodes -o json | jq -rM '.items[].status.addresses[] | select(.type == "InternalIP") | .address' | tee /tmp/nodes.txt
You can obtain the port the “foo-svc” service is listening on via the following CLI command:
kubectl get svc foo-svc -o json | jq -rM '.spec.ports[].nodePort' | tee /tmp/port.txt
With this information in hand, we’ll make a request to the apex route of our service on each cluster node to verify our application is functioning properly. Execute the following CLI command to accomplish this.
PORT=$(cat /tmp/port.txt)
cat /tmp/nodes.txt | while read IP; do curl http://${IP}:${PORT}; done
You should see the following output.
{ "version": "1.0.0" }
{ "version": "1.0.0" }
{ "version": "1.0.0" }
{ "version": "1.0.0" }
We’ll now alter one of the manifests in our repository to force a change in the system state by making a slight edit to “part1/app1/deployment.yaml”. This is accomplished by editing the “CONTENT” environment variable such that it reads “1.0.1” and then committing the changes.
name: foo-app
env:
  - name: CONTENT
    value: '{ "version": "1.0.1" }'
After a short wait, we will see that our application has updated itself automatically. Note that the default sync interval is set to 3 minutes.
View the health and sync status of the “foo-app” application using the following CLI command.
argocd app get foo-app | grep Status
You should see something like the following:
Sync Status:        Synced to  (5c8fe96)
Health Status:      Healthy
View the history of the “foo-app” application using the following CLI command.
argocd app history foo-app
Which should yield something like the following. The commit IDs will be different.
ID  DATE                           REVISION
0   2023-02-08 15:15:33 -0700 MST   (37b85c8)
1   2023-02-08 15:19:25 -0700 MST   (5c8fe96)
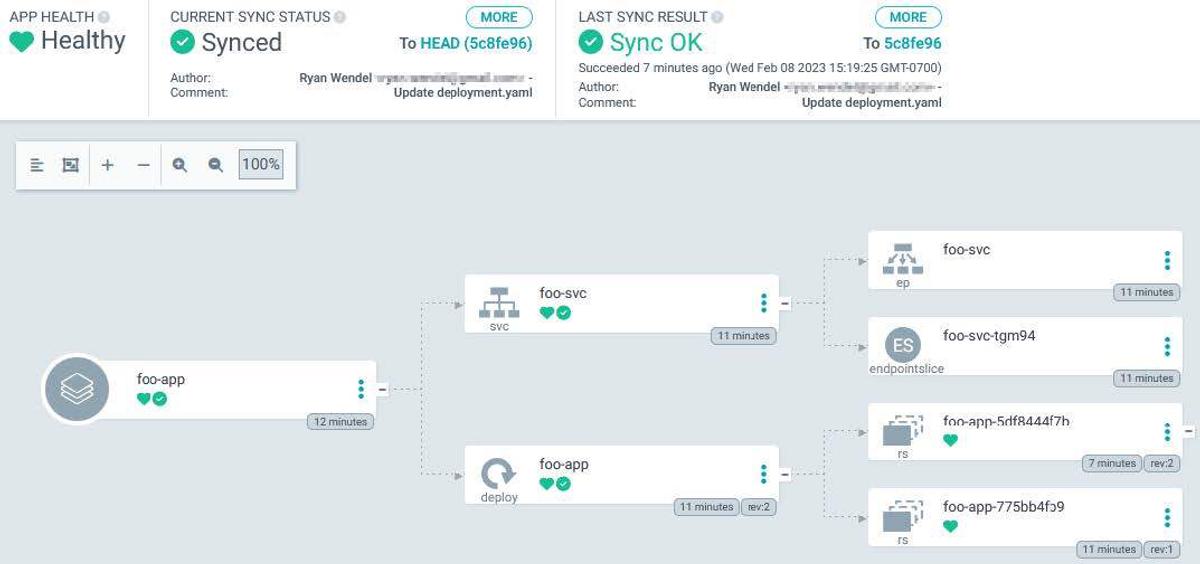
We can also view a nice graphical representation of the “foo-app” application in the web UI. Note the healthy sync status, revision numbers, and replica sets.
Knowing that the application has successfully synchronized, let’s make requests to the “foo-svc” service on each cluster node again. We’ll re-use the commands from before.
PORT=$(cat /tmp/port.txt)
cat /tmp/nodes.txt | while read IP; do curl http://${IP}:${PORT}; done
This time around we should see the following.
{ "version": "1.0.1" }
{ "version": "1.0.1" }
{ "version": "1.0.1" }
{ "version": "1.0.1" }
And with that, we have successfully and securely automated the deployment of an application using the continuous delivery tool known as Argo CD! Congrats!
You can delete the Argo CD application, and all of the resources it generated, by executing the following CLI command.
argocd app delete foo-app
Argo CD is a robust continuous delivery solution, whose capabilities far exceed those highlighted in this blog post. If you found this post interesting and intend to use Argo CD in a production environment, I highly suggest that you visit the following link to learn more about this tool’s rich feature set.
https://argo-cd.readthedocs.io/en/stable/
While you’re at it, it wouldn’t hurt to check out their security documentation!
https://github.com/argoproj/argo-cd/blob/master/docs/operator-manual/security.md
Looking for further guidance on Argo CD, GitOps, or Kubernetes? Contact us to discuss your potential use case with one of our experts!

Build an IPv6-to-IPv4 proxy using CloudFront to enable connectivity with IPv4-only AWS services.